
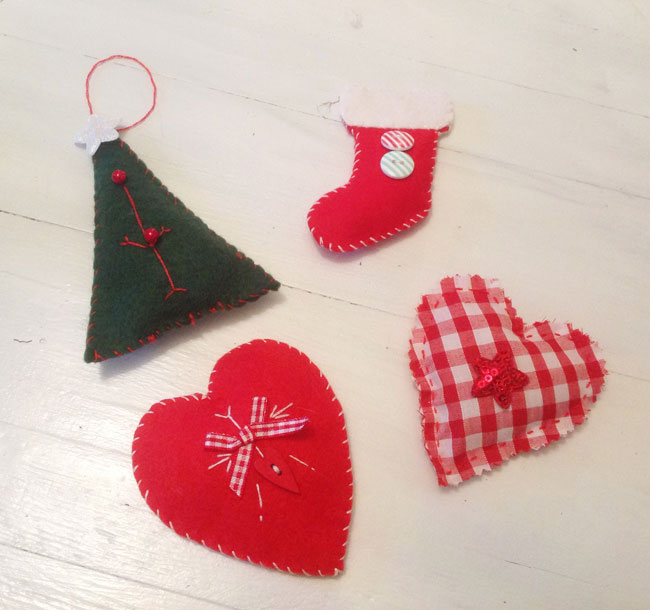
Look what we’ve been making! How cute are these little DIY Christmas decorations! You can either hang them on the tree, on the wall or grab a few small branches from the garden, paint them white, stand them in an old glass jar, tie a ribbon round the jar and hang these from them as a table centrepiece. And they are SO simple to make – fancy giving it a go? Here’s how:
What you’ll need:
– Scissors
– Tracing paper (kitchen greaseproof paper) and a pencil
– Tailors chalk if you have it.
– Felt and/or cotton in the colours that you want your decorations to be in.
– Pins, needle and thread in a colour which contrasts with the fabric. We used a few strands of embroidery thread but double thickness general purpose thread would be fine
– Embellishments – beads, buttons, ribbons – or whatever you have lying round the house
– Narrow ribbon for the hanging loops
– A small amount of wadding. You can use cotton wool or other old fabrics cut into small pieces if you don’t have wadding (get an old pair of socks and snip them into small pieces!)
How to:
Step 1: Either by freehand drawing or tracing a picture from a book/magazine etc, draw onto the tracing paper the shapes that you want as decorations – Christmas trees, hearts, stars, snowmen etc each about 10-12cm tall. Cut out 2 of each design and pin these templates onto the felt/fabric. Cut these shapes out so that you have 2 of each shape.
Step 2: Take one of these felt/fabric shapes (which will be the front) and, for those who aren’t comfortable freehand sewing, use the tailors chalk or just a pencil to draw (very lightly) onto it any designs that you want. For example in our photo above, onto the heart shape we lightly drew the lines that are now white.
Step 3: Using the embroidery thread/double strand of normal thread, stitch over these pencil lines, simply using them for guidance. Again, for example, on our heart shape above, we then stitched using white thread over the pencil lines.
Step 4: Sew on any beads, buttons or other embellishments that you want on your design.
Step 5: Take the decorated front shape and the matching blank back shape and pin them together WITH THE DECORATED SIDE ON THE OUTSIDE.
Step 6: Using your contrasting colour embroidery thread/double strand of thread, go round the edge of the shape with a blanket stitch using small stitches about 5mm apart. Remember not to go all the way round but leave a small space (about 4-5cm) where you can insert the wadding/other filling later on.
Step 7: When you reach the top of the shape, stop. Cut a length of the narrow ribbon to make the hanging loop. Fold it in half and place the two ends between the two layers of felt/other fabric at the top of the shape. Continue the blanket stitching around the rest of the shape, sandwiching the hanging loop between the felt as you stitch, still leaving the opening for the wadding. Do a few extra stitches over the ribbon to hold it in place. If you don’t have/don’t want to use ribbon you can alternatively just sew a loop using your thread, as we have for our tree decoration in the photo above.
Step 8: Once you have gone all the way round to the other side of your wadding gap, finish off your blanket stitch. Take your wadding/other filling and push it in through the gap that you’ve left. You can use a pencil to push it into the gap if it’s too fiddly to do with your finger. Don’t overfill it or the wadding/filling will start to stretch your blanket stitching at the sides.
Step 9: Sew up the opening using a blanket stitch to finish.
Tadaaa!
If you give this a go, please send us some photos of your finished decorations and we’ll add them to the post! If you have any other Christmas decoration DIY ideas – do let us know and we can share then with everyone.
Happy Making! xxx